
School Protocol
• The appearance of authority from a teacher or administrator should be the first reaction to potential physical conflict.
• Verbal commands must be utilized and be clearly understandable
• Provide a protocol for calling for assistance immediately
• Multiply authority presence as quickly as possible
• The use of physical intervention should be the very last action available to the teacher or administrator
Any physical intervention should only be used if someone’s safety or potential injury could occur if NO intervention was provided
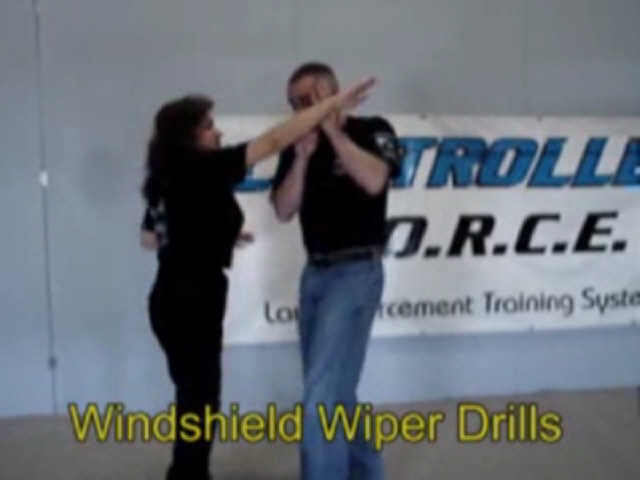
Windshield Wiper Drill
This drill is designed to get your arms moving and to develop simple blocking motions that will be expanded on. Make sure you are working to the inside of the student. Start by facing your student in the side stance (does not matter which side). As your student swings at your head, protect yourself from the strike by bringing your forward hand straight up in a wiper-like motion, keeping your elbow down. When you are working the inside, your hand and forearm should be straight up and down with your elbow. Do not reach to meet your student’s hand or arm. Your focus should be on protecting your face from the strike, not extending yourself out to the strike. Now move your arm back and forth to protect yourself from other possible strikes on both sides of the body.
Click her for video link Click her for video link
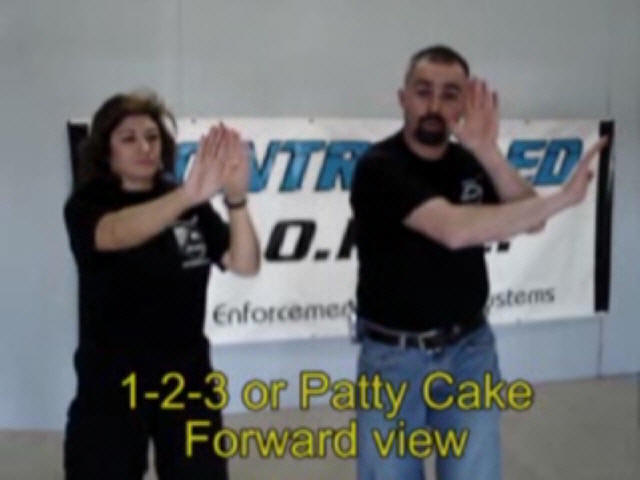
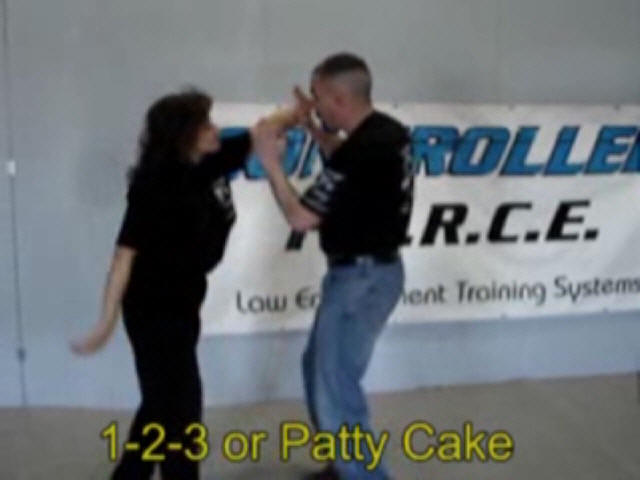
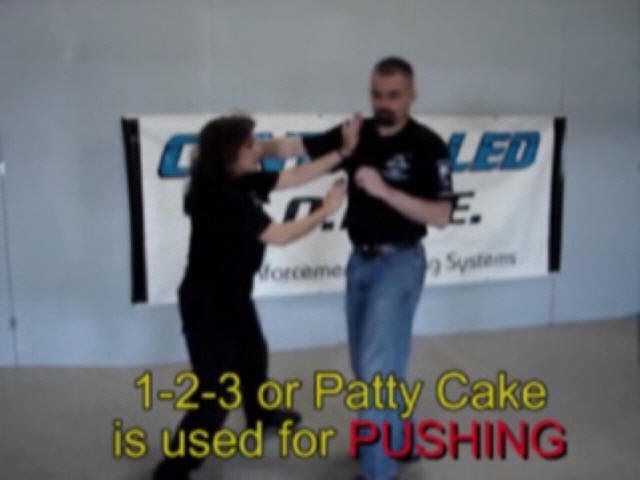
1-2-3 or Patty Cake Coordination Drills working the Inside
This drill is designed to improve eye/hand coordination by using both hands and combining protecting and pushing from the inside. Start by facing your student in the side stance. (Any side)
(1) Protect yourself from a strike with your lead hand using the windshield wiper drill.
(2) Reinforce the lead hand by reaching your free hand over to your student’s striking arm.
(3) You should then push the student with your original leading open hand. Your free hand should maintain control of the student’s original striking arm without grabbing. Repeat this drill from side-to-side and keep your hands moving.
Click here for video link Click here for video link Click here for video link
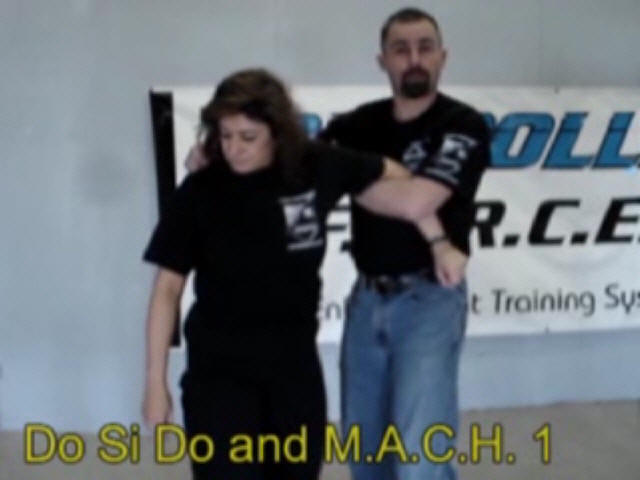
Do-Si-Do
Stand side-to-side with your partner, but face opposite directions. You and your partner interlock same side arms. Rotate your partner a few times and repeat this on the opposite side.
NOTE: It doesn’t matter which of your arms you interlock, either right or left, as long as they are on the same side as your student.
The reason for this is simple because in an actual conflict you will not be able to predetermine or control how your student will act. You must be prepared to react to his or her moves towards you.
M.A.C.H. 1
Mechanical Advantage Control Holds
Definition: “Mechanical Advantage” is the process of controlling someone with techniques that utilize position and movement, using the student’s body, resistance, and motion to achieve control.
To move into M.A.C.H. 1: Beginning from the do-si-do, take your free hand and place it on the opposite shoulder or hold on to the students clothing. You now take the hand used in the do-si-do, and, without releasing the do-si-do, hook the hand onto your bicep/forearm portion of the arm that you placed on your student’s shoulder. Trap the student’s arm (the one you hooked in a do-si-do) against your body by firmly squeezing your arms around the student’s arm.
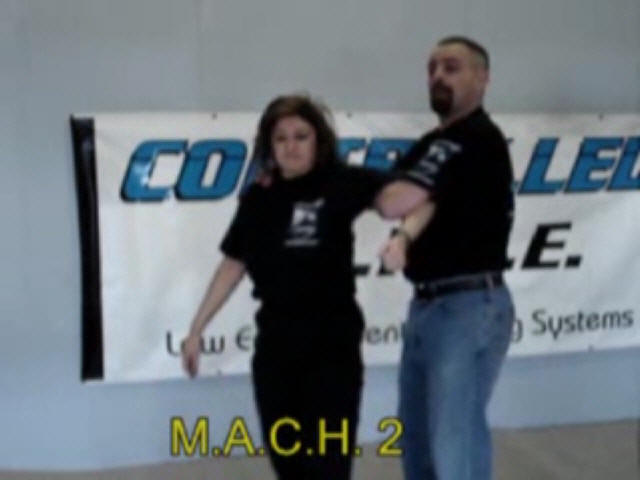
M.A.C.H. 2
This hold is considered a “Strength & Entry Level Hold” and can also be used as a lead hold when the student’s momentum is moving forward, or into the teacher. This hold stays tight into the shoulder, guiding it into the direction of the student’s momentum. Remember that a simple change of hand position and maintaining a tight hold is the key to successfully maintaining control without injury.
To move into M.A.C.H. 2: Take the arm that is holding your student’s shoulder (opposite) and simply move it to you’re his or her shoulder (arm you are currently holding in a do-si-do). This should be accomplished without losing the grip you had on your own bicep/forearm.
IMPORTANT: Remember to place your forearm into the student’s shoulder and not the back, as your student may have too much strength in the back and could resist the hold, making it ineffective. In this position you can re-direct the movement of your student, moving him or her in a forward direction.
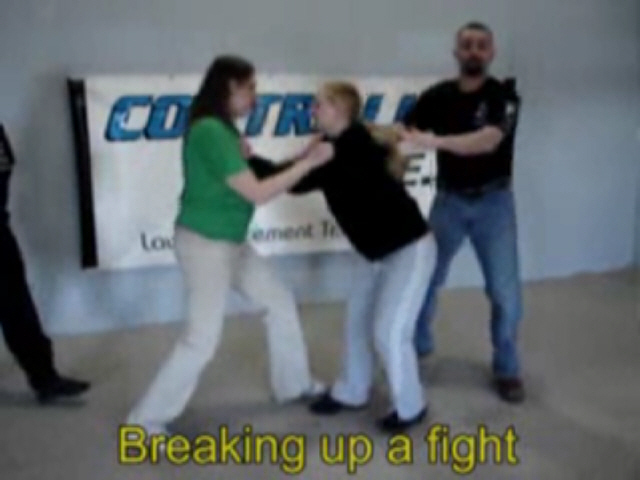
Breaking up two students fighting
The next video clip is used to specifically break-up two students tangle up in a fight. As demonstrated in the clip, the technique utilizes all of the preceding training and is used to effectively break-up the students with out harm to both students and teachers.
Demo clips from training provide to Educational Institutions
Mechanical Advantage Control Hold (M.A.C.H.)
Utilizing the M.A.C.H. to breakup two youths.